

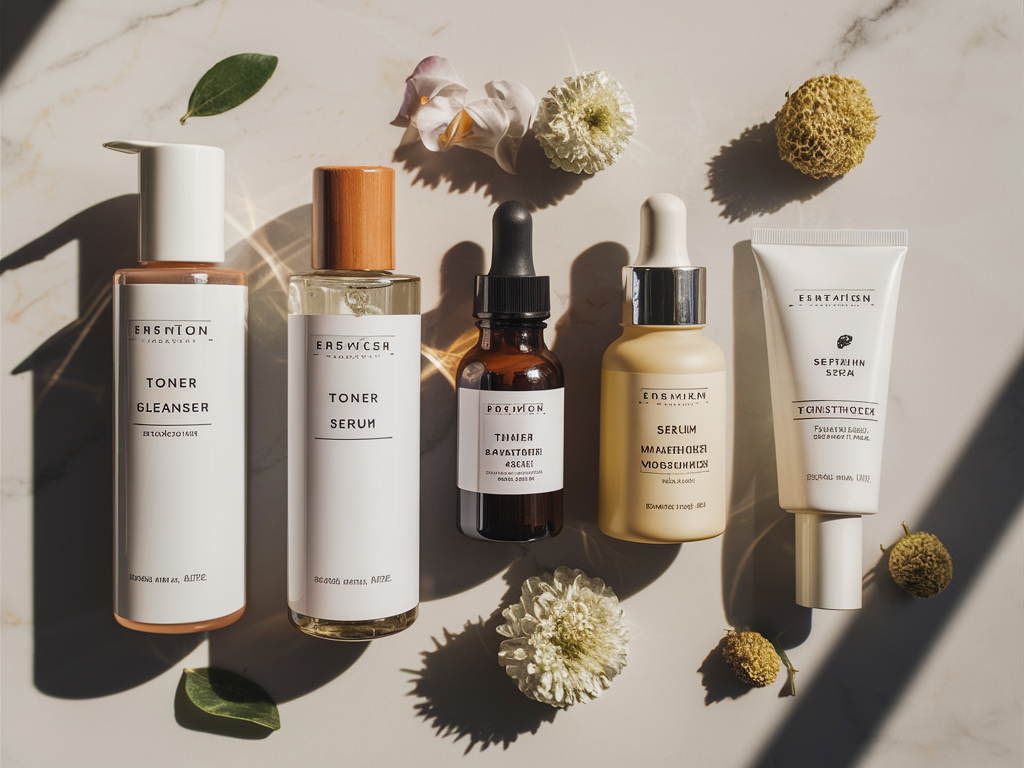
Creating a skincare routine that truly works isn’t just about using trendy products – it’s about understanding your skin’s unique needs and following a structured approach. With countless products available today, navigating the world of skincare can feel overwhelming. This comprehensive guide breaks down the essential steps every effective skincare regimen should include, regardless of your skin type or concerns.
Understanding Your Skin Type
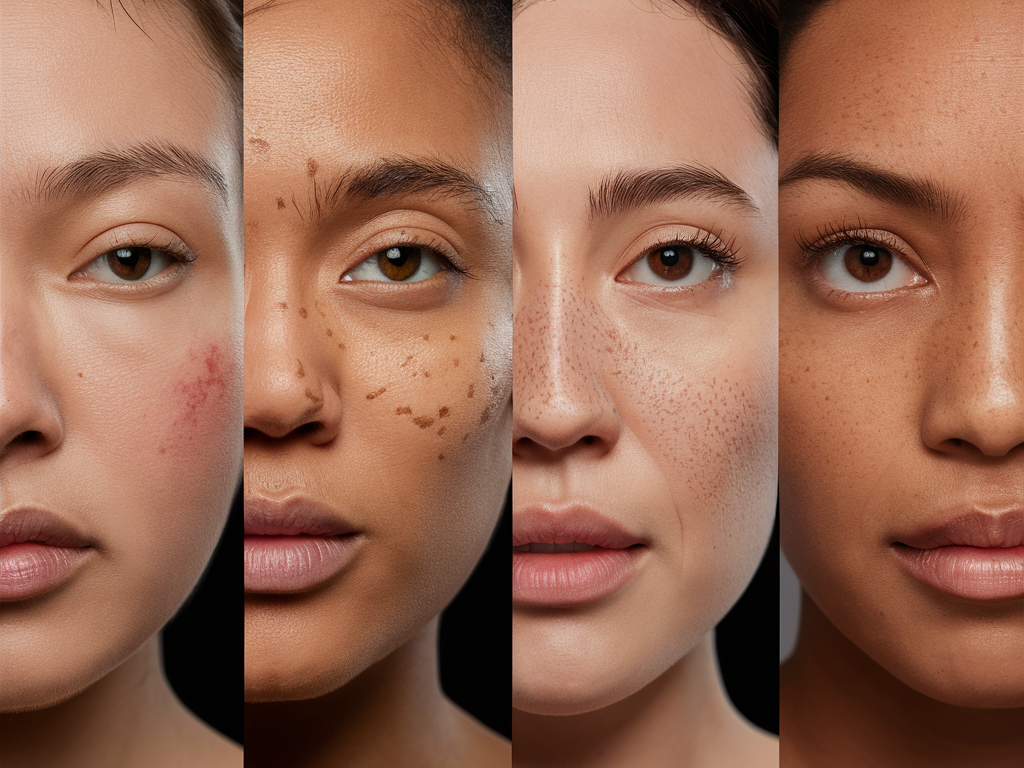
Before diving into specific products or routines, it’s crucial to identify your skin type. This foundational knowledge will guide all your skincare decisions and help you select products that work with, not against, your skin’s natural tendencies.
Identifying Your Skin Type
Most skin falls into one of these five categories:
- Normal skin: Balanced oil production, few imperfections, and minimal sensitivity
- Dry skin: Lacks oil, may feel tight, flaky, or rough
- Oily skin: Excess sebum production, prone to enlarged pores and acne
- Combination skin: Oily in the T-zone (forehead, nose, chin) but dry elsewhere
- Sensitive skin: Reacts easily to products or environmental factors with redness or irritation
Simple At-Home Skin Type Test
To determine your skin type at home, try this simple test:
- Wash your face with a gentle cleanser and pat dry
- Wait 30 minutes without applying any products
- Observe how your skin feels and looks:
- Tight all over? Likely dry skin
- Shiny all over? Likely oily skin
- Shiny in the T-zone but normal/dry elsewhere? Likely combination skin
- Comfortable with no noticeable oiliness or dryness? Likely normal skin
- Redness, itching, or burning? Possibly sensitive skin
Understanding your skin type significantly impacts which products will be most effective for you. For instance, those with oily skin benefit from lightweight, non-comedogenic formulas, while dry skin types need richer, more emollient products.
Morning vs. Evening Routine: Key Differences
Your skin has different needs during the day versus at night. Morning routines should focus on protection against environmental aggressors, while evening routines emphasize repair and rejuvenation.
Morning Routine Focus: Protection
During the day, your skin faces pollution, UV radiation, and other environmental stressors. Your morning routine should create a protective barrier with:
- Gentle cleansing to remove overnight buildup
- Antioxidant serums (like vitamin C) to neutralize free radicals
- Moisturizer to hydrate and strengthen the skin barrier
- Sunscreen as the final, non-negotiable step
Evening Routine Focus: Repair
Nighttime is when your skin naturally enters repair mode. Your evening routine should support this process with:
- Thorough cleansing to remove makeup, sunscreen, and daily pollution
- Treatment products with active ingredients like retinol, AHAs, or peptides
- Richer moisturizers to support overnight hydration
- Optional targeted treatments for specific concerns
Now, let’s examine each essential step in detail, exploring the purpose, techniques, and product recommendations for every skin type.
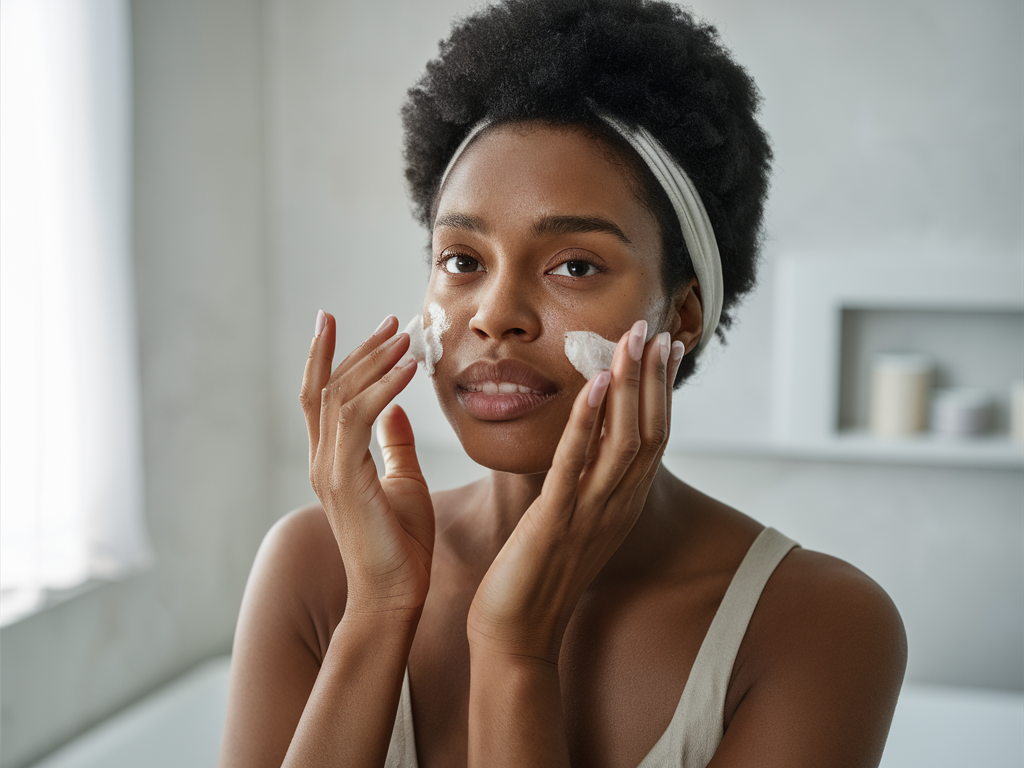
Essential Step 1: Cleansing
Cleansing is the foundation of any skincare routine. It removes dirt, excess oil, makeup residue, and environmental pollutants that can clog pores and lead to breakouts.
Purpose and Benefits
Proper cleansing:
- Prevents clogged pores and subsequent breakouts
- Removes dead skin cells that can make skin appear dull
- Prepares skin to better absorb subsequent products
- Helps maintain proper pH balance
Techniques for Proper Cleansing
For optimal results:
- Use lukewarm water (hot water can strip natural oils)
- Apply cleanser using gentle, circular motions for 30-60 seconds
- Pay special attention to areas prone to congestion (T-zone, hairline)
- Rinse thoroughly and pat (don’t rub) skin dry with a clean towel
Double Cleansing Method Explained
This two-step process is especially beneficial for those who wear makeup, sunscreen, or live in polluted environments:
- Oil-based cleanser first: Dissolves oil-based impurities like sebum, sunscreen, and makeup
- Water-based cleanser second: Removes water-based impurities like sweat and dirt
Cleanser Recommendations by Skin Type
- Dry skin: Cream or lotion cleansers with hydrating ingredients like glycerin or hyaluronic acid
- Oily skin: Gel or foaming cleansers with salicylic acid or tea tree oil
- Combination skin: Balanced gel cleansers that won’t strip or over-hydrate
- Sensitive skin: Fragrance-free, gentle cleansers with soothing ingredients like chamomile or aloe
- Normal skin: Most cleanser types work well; focus on maintaining balance
Essential Step 2: Toning
Modern toners have evolved beyond the harsh, alcohol-based astringents of the past. Today’s formulations offer numerous benefits when incorporated correctly into your routine.
Purpose and Benefits
Well-formulated toners:
- Balance skin’s pH after cleansing
- Add a first layer of hydration
- Remove any remaining traces of cleanser or impurities
- Prepare skin to better absorb subsequent treatments
- Can deliver beneficial ingredients in a lightweight format
Application Techniques
For maximum benefit:
- Apply immediately after cleansing while skin is still slightly damp
- Pour a small amount onto clean hands or a cotton pad
- Gently press or pat into skin rather than wiping or rubbing
- Allow to fully absorb before moving on to serums
Ingredients to Look For Based on Skin Type
- Dry skin: Hyaluronic acid, glycerin, panthenol, and rosewater
- Oily skin: Witch hazel (alcohol-free), niacinamide, zinc, and tea tree
- Combination skin: Balancing ingredients like niacinamide and hydrating components
- Sensitive skin: Centella asiatica, aloe vera, and chamomile
- Normal skin: Antioxidants, humectants, and soothing ingredients
Common Toner Mistakes to Avoid
- Using alcohol-heavy formulas that strip the skin
- Over-applying exfoliating toners (those containing AHAs/BHAs)
- Rubbing rather than pressing toner into skin
- Using cotton pads with exfoliating toners (wastes product and can be harsh)
Essential Step 3: Serums
Serums are concentrated treatments designed to deliver high percentages of active ingredients to address specific skin concerns. Their lightweight, fast-absorbing formulas penetrate deeply into the skin.
Purpose and Benefits
Effective serums:
- Target specific skin concerns with potent ingredients
- Deliver actives more effectively due to smaller molecular weight
- Provide focused treatment that moisturizers cannot
- Often show more visible results than other skincare steps
Key Ingredients to Look For
- Vitamin C: Brightens, protects against free radicals, boosts collagen production
- Hyaluronic Acid: Hydrates by drawing moisture into the skin
- Niacinamide: Regulates oil, minimizes pores, strengthens barrier function
- Retinol/Retinoids: Accelerates cell turnover, diminishes fine lines, improves texture
- Peptides: Supports collagen production and skin firmness
- AHAs/BHAs: Exfoliate, clear pores, and improve skin texture
How to Layer Multiple Serums
When using multiple serums:
- Apply from thinnest to thickest consistency
- Start with water-based serums, followed by oil-based ones
- Wait 30-60 seconds between layers for proper absorption
- Limit to 2-3 serums per routine to avoid overloading skin
- Consider alternating certain actives (like vitamin C in morning, retinol at night)
Best Serums for Specific Skin Concerns
- Acne: Salicylic acid, niacinamide, tea tree
- Hyperpigmentation: Vitamin C, alpha arbutin, tranexamic acid, kojic acid
- Anti-aging: Retinol, peptides, growth factors, CoQ10
- Dehydration: Multiple molecular weights of hyaluronic acid, glycerin, panthenol
- Sensitivity/Redness: Centella asiatica, green tea, licorice root extract
Essential Step 4: Eye Cream
The skin around your eyes is significantly thinner and more delicate than the rest of your face, making it more prone to signs of aging, fatigue, and environmental damage.
Why the Eye Area Needs Special Attention
The eye area:
- Has fewer oil glands, making it prone to dryness
- Is thinner (about 0.5mm vs. 2mm elsewhere on the face)
- Shows signs of aging and fatigue earlier than other areas
- Has unique concerns like puffiness and dark circles
- Is more sensitive to irritating ingredients
Application Techniques
For effective application:
- Use your ring finger (it applies the least pressure)
- Take a pea-sized amount for both eyes
- Gently tap, don’t rub, along the orbital bone
- Apply from the outer to inner corner to prevent dragging
- Allow to absorb fully before applying makeup
Ingredients to Look For
- For dark circles: Vitamin K, caffeine, vitamin C, niacinamide
- For puffiness: Caffeine, green tea, peptides
- For fine lines: Retinol (in gentler formulations), peptides, hyaluronic acid
- For general care: Ceramides, antioxidants, squalane
When to Start Using Eye Cream
Most dermatologists recommend beginning preventative eye care in your mid-20s, though anyone experiencing specific eye area concerns can benefit from targeted products at any age. Prevention is always easier than correction, particularly for this delicate area.
Essential Step 5: Spot Treatments
Spot treatments deliver concentrated active ingredients to address specific skin concerns like acne, dark spots, or patches of extreme dryness.
Purpose and Benefits
Effective spot treatments:
- Target individual concerns without affecting surrounding skin
- Deliver higher concentrations of active ingredients than would be safe for full-face use
- Accelerate healing for acute skin issues
- Can provide overnight improvement for many concerns
When to Apply in Your Routine
The timing depends on the formulation:
- Water-based treatments: Apply after serums but before moisturizer
- Oil-based treatments: Apply after water-based products
- Treatment patches: Apply to clean skin, then continue routine around them
- Clay or drying treatments: Usually best as the final step
Active Ingredients That Work
- For acne: Benzoyl peroxide (kills bacteria), salicylic acid (unclogs pores), sulfur (anti-inflammatory)
- For dark spots: Hydroquinone, vitamin C, alpha arbutin, kojic acid, azelaic acid
- For rough patches: Lactic acid, urea, glycolic acid
- For flaky areas: Ceramides, panthenol, colloidal oatmeal
Different Treatments for Different Concerns
Consider these specialized approaches:
- For cystic acne: Anti-inflammatory ingredients like hydrocortisone, sulfur, or zinc
- For whiteheads: Drying formulas with sulfur or benzoyl peroxide
- For post-inflammatory hyperpigmentation: Brightening ingredients like niacinamide, tranexamic acid
- For skin picking recovery: Healing ingredients like centella asiatica, panthenol, and petroleum
Essential Step 6: Moisturizing
Moisturizing is critical for all skin types, as it helps maintain the skin barrier, prevents water loss, and creates a smooth, healthy appearance.
Purpose and Benefits
Regular moisturizing:
- Strengthens the skin’s protective barrier
- Prevents transepidermal water loss (TEWL)
- Maintains proper hydration levels
- Creates a smooth canvas for makeup application
- Can help balance oil production even in oily skin types
Finding the Right Consistency
The ideal texture varies by skin type:
- Dry skin: Rich creams or balms with emollient and occlusive ingredients
- Oily skin: Lightweight gel or lotion formulations
- Combination skin: Lightweight formulas all over with richer products on dry areas as needed
- Sensitive skin: Simple formulations without potential irritants
- Normal skin: Medium-weight lotions or creams
Moisturizer Ingredients for Each Skin Type
- Dry skin: Shea butter, ceramides, fatty acids, squalane, hyaluronic acid
- Oily skin: Niacinamide, hyaluronic acid, glycerin (avoiding heavy oils)
- Combination skin: Balanced humectants like glycerin and lightweight hydrators
- Sensitive skin: Oat derivatives, aloe, centella asiatica, minimal ingredient lists
- Mature skin: Peptides, ceramides, antioxidants, hyaluronic acid
Application Techniques
For maximum benefit:
- Apply to slightly damp skin to lock in moisture
- Use upward, outward motions to avoid dragging the skin
- Don’t forget often-missed areas like the neck and upper chest
- Allow moisturizer to fully absorb before applying sunscreen or makeup
- Use slightly more at night when skin experiences increased water loss
Essential Step 7: Face Oils
Face oils provide an additional layer of nourishment and protection, especially beneficial for dry, dehydrated, or mature skin types.
Purpose and Benefits
Quality face oils:
- Provide essential fatty acids that strengthen the skin barrier
- Create an occlusive layer to seal in moisture
- Many contain antioxidants that protect against environmental damage
- Can balance the skin’s natural oil production
- Add a healthy, natural glow to the complexion
How to Incorporate Into Routine
Facial oils should be applied:
- After water-based products but before or after moisturizer (depending on the oil’s weight)
- 3-4 drops warmed between palms and pressed (not rubbed) into skin
- More generously at night if desired
- More sparingly in the morning, especially under makeup
Best Oils for Different Skin Types
- Dry skin: Argan oil, marula oil, avocado oil, rosehip oil
- Oily/acne-prone skin: Lightweight non-comedogenic oils like squalane, jojoba oil, tea tree oil
- Combination skin: Jojoba oil, grapeseed oil, squalane oil
- Sensitive skin: Camellia oil, squalane, borage seed oil
- Mature skin: Rosehip oil, sea buckthorn oil, pomegranate seed oil
Common Myths About Face Oils
Some misconceptions to address:
- Myth: Oils cause breakouts for everyone – Actually, many oils are non-comedogenic
- Myth: Oily skin should never use facial oils – The right oils can help balance sebum production
- Myth: All natural oils are interchangeable – Each has unique fatty acid profiles and benefits
- Myth: Oils replace moisturizers – They work better in conjunction with humectant products
Essential Step 8: Sunscreen
Sunscreen is the single most important anti-aging and skin health product you can use. It protects against UV damage, which contributes to premature aging, hyperpigmentation, and skin cancer.
Importance of Daily Sun Protection
Daily sunscreen use:
- Prevents premature aging (90% of skin aging is caused by sun exposure)
- Reduces risk of skin cancer
- Prevents hyperpigmentation and uneven skin tone
- Maintains the results of other skincare treatments
- Protects the skin barrier from UV damage
How to Choose the Right SPF
When selecting sunscreen:
- Choose broad-spectrum protection (UVA and UVB)
- Select SPF 30 or higher for daily use
- Consider SPF 50+ for extended outdoor activities
- Match the formulation to your skin type (gel for oily, cream for dry)
- Ensure it’s comfortable enough to wear daily
Application Techniques and Timing
For effective protection:
- Apply as the final step in your morning skincare routine
- Use approximately ¼ teaspoon (1.25ml) for the face alone
- Don’t forget often-missed areas: ears, neck, eyelids, hairline
- Allow chemical sunscreens to absorb for 15-20 minutes before sun exposure
- Reapply every 2 hours of sun exposure or after swimming/sweating
Physical vs. Chemical Sunscreens
Understanding the differences:
- Physical (mineral) sunscreens:
- Active ingredients: zinc oxide, titanium dioxide
- Work by reflecting UV rays away from skin
- Effective immediately upon application
- Less irritating for sensitive skin
- May leave white cast, especially on deeper skin tones
- Chemical sunscreens:
- Active ingredients: avobenzone, octinoxate, octisalate, etc.
- Work by absorbing UV rays and converting to heat
- Need 15-20 minutes to become effective
- Usually more lightweight and invisible on skin
- May cause irritation in sensitive individuals
Essential Step 9: Exfoliation
Exfoliation removes dead skin cells from the surface, revealing fresher, more radiant skin underneath and helping other products penetrate more effectively.
Purpose and Benefits
Regular exfoliation:
- Removes buildup of dead skin cells
- Improves skin texture and tone
- Helps prevent clogged pores and breakouts
- Enhances the absorption of other skincare products
- Stimulates cell renewal for more youthful appearance
Physical vs. Chemical Exfoliants
The two main approaches to exfoliation:
- Physical exfoliants:
- Work through manual scrubbing with particles or tools
- Examples: scrubs with jojoba beads, silicone brushes, microfiber cloths
- Provide immediate results
- Can be too harsh if overused or applied with pressure
- Chemical exfoliants:
- Work by dissolving the bonds between dead skin cells
- AHAs (glycolic, lactic) work on the skin’s surface – good for dry, sun-damaged skin
- BHAs (salicylic acid) penetrate into pores – ideal for oily, acne-prone skin
- PHAs (gluconolactone, lactobionic acid) are gentler and suitable for sensitive skin
- Enzymes (pumpkin, papaya) provide gentle exfoliation
Frequency Based on Skin Type
Optimal exfoliation frequency varies:
- Dry/sensitive skin: 1-2 times per week with gentle exfoliants
- Normal skin: 2-3 times per week
- Oily/acne-prone skin: Up to 3-4 times per week with appropriate products
- Mature skin: 2-3 times per week to stimulate cell turnover
How to Avoid Over-Exfoliation
Signs of over-exfoliation include redness, sensitivity, tightness, excessive dryness, or a shiny but not oily appearance. To prevent this:
- Start with once-weekly exfoliation and gradually increase
- Never use multiple exfoliating products in the same routine
- Be cautious with combining exfoliants and other actives like retinol
- Always follow with proper hydration and sun protection
- Listen to your skin and reduce frequency if irritation occurs
Essential Step 10: Masks and Treatments
Masks and specialty treatments provide intensive therapy for specific skin concerns or general skin health. They complement regular routines with periodic boosts of active ingredients.
Types of Masks and Their Benefits
- Clay masks: Draw out impurities, absorb excess oil, and tighten pores
- Hydrating masks: Deliver intense moisture for dehydrated or dry skin
- Sheet masks: Provide concentrated serums in an occlusive environment
- Exfoliating masks: Remove dead skin cells and improve texture
- Gel masks: Cool, soothe, and hydrate inflamed or irritated skin
- Overnight masks: Provide sustained treatment during sleep
How Often to Use Masks
The optimal frequency depends on the mask type and your skin’s needs:
- Clay/purifying masks: 1-2 times weekly for oily skin; bi-weekly for normal/combination
- Hydrating masks: Up to 3 times weekly or as needed when skin feels dehydrated
- Exfoliating masks: 1-2 times weekly, not combined with other exfoliation
- Sheet masks: 1-3 times weekly, more frequently for special events
Overnight Treatments
Overnight treatments leverage your skin’s natural repair cycle during sleep:
- Sleeping masks seal in moisture and active ingredients
- Retinol treatments promote cell turnover without sun sensitivity concerns
- AHA treatments exfoliate while you sleep
- Oil treatments deeply nourish without concerns about daytime shine
DIY vs. Store-Bought Options
Both approaches have their place:
- DIY masks:
- Allow for natural, fresh ingredients
- Can be customized to current skin needs
- Often more affordable
- Best kept simple with ingredients like honey, yogurt, oatmeal, or avocado
- Store-bought masks:
- Contain stabilized, tested active ingredients
- Offer precise formulations with proven efficacy
- Often provide more sophisticated delivery systems
- Have longer shelf life and convenience
Adjusting Your Routine for Specific Conditions
While the 10 essential steps provide a framework, certain skin conditions require special accommodations to address specific concerns effectively.
Acne-Prone Skin Adjustments
- Focus on gentle, non-stripping cleansers to avoid triggering more oil production
- Incorporate BHA (salicylic acid) products to unclog pores
- Add benzoyl peroxide as a spot treatment for inflammatory acne
- Use non-comedogenic, lightweight moisturizers
- Consider ingredients like niacinamide to regulate sebum and reduce inflammation
- Be cautious with physical exfoliation, which can spread bacteria
Anti-Aging Focus Adjustments
- Prioritize sunscreen as the most important anti-aging product
- Incorporate retinoids for cell turnover and collagen production
- Add antioxidants like vitamin C to protect from free radical damage
- Include peptides to support collagen and elastin
- Use hydrating ingredients like hyaluronic acid to plump fine lines
- Consider regular chemical exfoliation to improve texture and radiance
Hyperpigmentation Treatment Adjustments
- Focus on diligent sun protection to prevent darkening
- Incorporate brightening ingredients: vitamin C, alpha arbutin, tranexamic acid
- Add gentle exfoliation with AHAs to remove pigmented cells
- Consider specialized treatments with ingredients like kojic acid or niacinamide
- Be consistent and patient, as pigmentation improvements take time
- Avoid irritation, which can worsen hyperpigmentation
Seasonal Routine Changes
Adjust your routine with the seasons:
- Summer adjustments:
- Lighter moisturizers
- Higher SPF and more frequent reapplication
- Potential increase in gentle exfoliation
- Antioxidant protection against increased UV exposure
- Winter adjustments:
- Richer, more emollient moisturizers
- Reduced exfoliation frequency
- Addition of facial oils
- Continued sun protection, especially in snowy environments
- Humectant serums to combat indoor heating
Building a Budget-Friendly Routine
An effective skincare routine doesn’t have to break the bank. Strategic product selection can deliver excellent results at various price points.
Essential vs. Optional Products
If on a tight budget, prioritize these essentials:
- Gentle cleanser
- Moisturizer appropriate for your skin type
- Broad-spectrum sunscreen SPF 30+
Add these as budget allows:
- Treatment product for your primary concern (e.g., salicylic acid for acne)
- Hydrating toner or essence
- Antioxidant serum
- Exfoliator
- Specialized masks and treatments
Drugstore Alternatives to Luxury Products
Many affordable brands offer formulations comparable to high-end products:
- Look for simple, focused formulations with key active ingredients
- Compare ingredient lists rather than marketing claims
- Research dupes for specific luxury products
- Consider brands like The Ordinary, The Inkey List, CeraVe, and La Roche-Posay
Multi-Purpose Products to Save Money
Look for products that serve multiple functions:
- Moisturizers with SPF for basic daily protection
- Tinted sunscreens that provide coverage and protection
- Balms that work for lips, cuticles, and dry patches
- Hydrating toners that also exfoliate gently
- Oils that can be used on face, hair, and body
What’s Worth Splurging On
If you can invest in only a few premium products, consider:
- Active treatment serums with vitamin C, retinoids, or peptides
- Sunscreen you enjoy applying (ensuring daily use)
- Products addressing your primary skin concern
- Items that come into direct contact with your skin for extended periods
Common Mistakes to Avoid
Even with the best products, certain habits can undermine your skincare efforts. Avoid these common pitfalls for better results.
Using Too Many Active Ingredients
This “kitchen sink” approach can lead to:
- Irritation, redness, and sensitized skin
- Compromised skin barrier function
- Ingredients neutralizing each other’s effectiveness
- Difficulty identifying which products are helping or hurting
Instead, focus on 1-2 active ingredients per routine and introduce new products gradually.
Improper Product Order
Using products in the wrong sequence can reduce efficacy:
- Oil-based products can prevent water-based ones from penetrating
- Applying actives after occlusive products reduces their effectiveness
- Using exfoliants after calming products can negate their benefits
Follow the general rule: cleanse ? tone ? lightest to heaviest consistency ? sunscreen (AM only).
Inconsistency in Routine
Skincare results require consistent application:
- Skipping days reduces efficacy, especially for active ingredients
- Constantly switching products prevents seeing long-term benefits
- Irregular sunscreen use undermines anti-aging efforts
Consistency with simple, effective products outperforms intermittent use of complex routines.
Ignoring Skin Changes
Your skin’s needs evolve with:
- Seasonal changes
- Hormonal fluctuations
- Age
- Stress levels
- Environmental factors
Regularly assess your skin’s current condition and be willing to adjust products accordingly.
Conclusion
The Importance of Patience and Consistency
Significant skin improvements require time:
- Cell turnover takes approximately 28 days (longer as we age)
- Most active ingredients need 6-12 weeks to show meaningful results
- Inconsistent use extends this timeline significantly
- Long-term use provides cumulative benefits beyond initial improvements
Listening to Your Skin’s Needs
Your skin communicates its needs if you pay attention:
- Tightness suggests dehydration or barrier damage
- Persistent redness may indicate sensitivity or overexfoliation
- Increased oiliness could signal dehydration
- Breakouts in unusual areas may relate to new products
Learn to differentiate between purging (temporary) and negative reactions requiring product discontinuation.
When to Consult a Dermatologist
Seek professional guidance for:
- Persistent acne unresponsive to over-the-counter treatments
- Rashes, hives, or unusual skin reactions
- Changes in moles or new growths
- Severe rosacea or persistent redness
- Scarring or textural issues
- When considering prescription-strength treatments
Final Tips for Maintaining Healthy Skin
Remember these fundamental truths:
- Skin health reflects overall wellness – prioritize sleep, hydration, and nutrition
- Stress management significantly impacts skin appearance
- Sun protection is non-negotiable for skin health
- Gentle, consistent care outperforms aggressive treatments
- Your skin is unique – what works for others may not work for you
By understanding the essential steps of an effective skincare routine and adapting them to your specific needs, you can achieve and maintain healthy, radiant skin at any age. Remember that skincare is a journey, not a destination – enjoy the process of discovering what works best for your unique complexion.